The Hub and the Heavyweights: Finding Models and Running Big Ones Without Melting Your Laptop
Series: Practical PyTorch · I (Phase I) — Part 8 of 9
So far you’ve run models that someone handed you by name. You typed "distilbert-base-uncased" or "Qwen/Qwen2.5-0.5B-Instruct" into a pipeline() and it just worked. But where do those names come from? And what happens when the model you actually want is too big to fit on the free GPU you’ve been borrowing? This post answers both. First half: how to find a model on the Hugging Face Hub and read it like an adult, license included. Second half: the handful of levers that let you run a model several times bigger than the hardware “should” allow.
The Hub is the App Store for models
huggingface.co/models is where the open-model world keeps its inventory — hundreds of thousands of pretrained models, each with a name, a page, and (usually) the actual weights you can download. Those model names you’ve been pasting into pipeline() are just addresses on the Hub. Learning to browse it is the difference between “running the three models a tutorial mentioned” and “running whatever the field shipped last week.”
The left sidebar is the part that matters. Filter by task first — “Text Generation,” “Image Classification,” “Automatic Speech Recognition,” and so on. The task names line up with the pipeline() tasks you already know, so a model filed under “Text Classification” is one you can hand straight to pipeline("text-classification", model=...). Filtering by task instantly cuts the catalog from “everything” down to “things that do the job I have.”
Then sort by downloads or likes. This is a crude but honest popularity signal: a model with millions of downloads has been battle-tested by a lot of people, and its quirks are probably documented in some forum thread you can find. A brand-new model with 40 downloads might be brilliant or might be someone’s half-finished experiment. For your first attempt at a task, boring and popular beats exciting and obscure.
Reading the model card
Click any model and you land on its model card — a README the authors wrote, and your single best source of truth. A good card tells you four things, and you should look for all four:
- What it does — the task, the training data, the languages it speaks. A model trained only on English will disappoint you in German.
- Inputs and outputs — what you feed it and what shape comes back. This is where you confirm a “text-generation” model wants a string and returns a string, versus a “fill-mask” model that wants a
[MASK]token. - Intended use (and misuse) — the authors often spell out what it’s good for and where it falls down. Worth reading before you build on top of it.
- How to load it — most cards include a copy-paste snippet. When in doubt, use theirs; it encodes choices (the right tokenizer, the right class) you’d otherwise have to guess.
The card is prose, not a spec, so quality varies. But the size and download numbers next to the model name are always there, and those two numbers alone — how big and how trusted — will steer most of your choices.
The license is not optional
Here’s the part engineers skip and regret. Every model has a license, and it governs what you’re allowed to do with it. It’s listed in the card’s metadata, usually right at the top.
- Apache-2.0 / MIT / BSD — permissive. Commercial use is fine. These are the ones you want for anything that might ship.
- Llama / Gemma / and other custom licenses — usually fine for most uses but carry conditions (acceptable-use clauses, sometimes a user-count threshold). Readable, but actually read them.
- CC-BY-NC / “research only” / “non-commercial” — exactly what it says. Great for a demo, a lawsuit waiting to happen in a product.
If you’re running something for fun in a notebook, the license rarely bites. The moment a model is going into a product — even an internal one — the license is a real constraint, and “I didn’t check” is not a defense. When in doubt, filter the Hub to Apache-2.0 and MIT and never think about it again.
Gated models: when you have to ask first
Some models — Llama, Gemma, a few others — are gated. The card shows a form instead of a download button: you accept the terms (sometimes the authors review the request), and only then can you pull the weights. To use a gated model from code, you log in with a Hugging Face access token so the Hub knows it’s you and you’ve agreed.
You create a token once at huggingface.co/settings/tokens (a read-scoped one is enough), then:
from huggingface_hub import login

login()  # paste your token when prompted — or set HF_TOKEN in Colab's secrets
In Colab, the tidier path is the key icon in the left sidebar: add a secret named HF_TOKEN, and transformers will pick it up automatically — no pasting a token into a cell where it might get committed somewhere it shouldn’t. Either way, once you’re logged in and you’ve accepted the terms on the model’s page, the gated model loads exactly like any other.
The memory problem
Now the heavyweights. The reason you can’t just load any model you fancy is VRAM — the memory on the GPU. A model’s weights have to fit there to run fast, and big models have a lot of weights.
Here’s the rule of thumb that demystifies the whole thing. By default, weights are stored as 32-bit floating-point numbers — 4 bytes each. So a model’s memory footprint, roughly, is:
number of parameters × 4 bytes
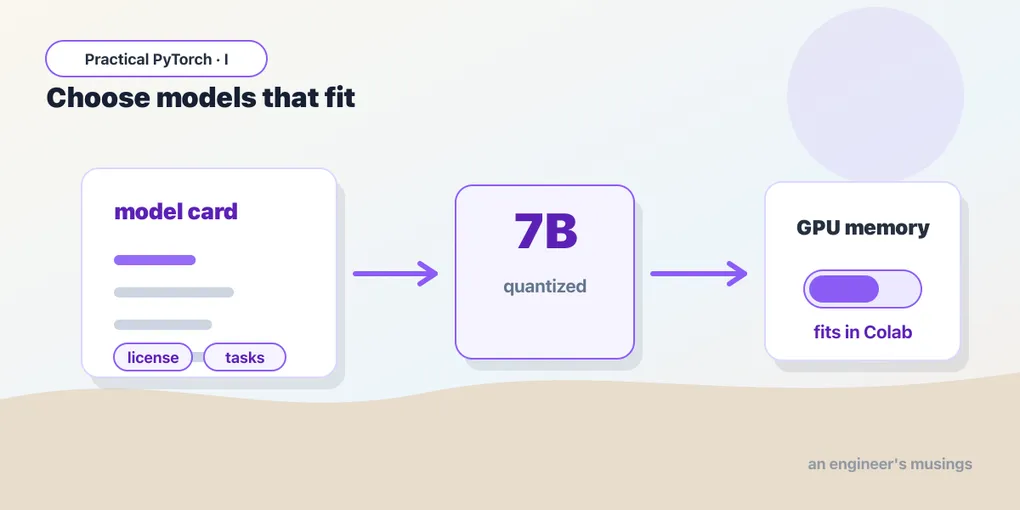
A 7-billion-parameter model in 32-bit is 7e9 × 4 ≈ 28 GB. The free Colab T4 GPU has 16 GB. The math doesn’t work; you’ll get a CUDA out of memory error before the model finishes loading. So either the model gets smaller, or each number gets cheaper. We can’t shrink the model. So we make the numbers cheaper, and there are three levers for that.
Lever 1: pick the right GPU
The cheapest fix is hardware you might already have access to. In Colab, Runtime → Change runtime type lets you pick the accelerator. The free tier gives you a T4 (16 GB), which is plenty for models up to a few billion parameters once you apply the tricks below. Colab Pro adds beefier options (L4, A100) with more VRAM. Knowing how much memory you’ve got is step one — everything else is fitting the model into it.
import torch
print("GPU available:", torch.cuda.is_available())
if torch.cuda.is_available():
    print(torch.cuda.get_device_name(0))
    print("VRAM (GB):", round(torch.cuda.get_device_properties(0).total_memory / 1e9, 1))
Lever 2: half precision (fp16 / bf16)
The first real trick: stop using 4-byte numbers. Half precision stores each weight in 2 bytes instead of 4, which halves the memory: that 28 GB model drops to ~14 GB. For running pretrained models (inference), the quality cost is essentially zero; this is what almost everyone does by default.
You ask for it with torch_dtype:
from transformers import pipeline
import torch

pipe = pipeline(
    "text-generation",
    model="Qwen/Qwen2.5-0.5B-Instruct",   # tiny + Apache-2.0; just an illustration
    torch_dtype=torch.bfloat16,
    device_map="auto",
)
Two flavors: float16 (a.k.a. fp16) and bfloat16 (bf16). They’re both 2 bytes; bf16 trades a little precision for a wider range and is the safer default on modern GPUs (it rarely produces the “everything turned to NaN” surprises fp16 occasionally does). The 0.5B model above is far too small to need any of this — it’s the example precisely because it’ll run anywhere while you learn the mechanics. The same two lines are what make a 7B model fit on a T4.
Lever 3: device_map=“auto”
Notice device_map="auto" in that snippet. That’s accelerate doing the placement for you: it looks at your hardware and decides where each piece of the model lives (the GPU if there’s room, spilling onto CPU memory if not). Without it you’d be writing model.to("cuda") by hand and managing placement yourself; with it, you say “auto” and stop thinking about it. It needs the accelerate package installed, which is why our notebook pulls it in. For anything bigger than a toy, device_map="auto" is the line you’ll always include.
Lever 4: 4-bit quantization
Half precision gets you to 2 bytes. Quantization goes further — down to roughly half a byte per weight (4 bits) — and it’s how people run genuinely large models on modest GPUs.
The plain-English version: a weight is just a number, and you don’t actually need 32 bits of precision to store “approximately 0.37.” Quantization stores each weight with far fewer bits — packing the values into a smaller range and remembering a little scaling info to undo it. The model takes up much less VRAM. The cost is a small, usually-tolerable drop in quality, because you’ve rounded off some precision. For a 7B model: 28 GB → ~14 GB (fp16) → ~4-5 GB (4-bit). That’s the difference between “won’t load” and “loads with room to spare on a free T4.”
You turn it on with BitsAndBytesConfig:
from transformers import AutoModelForCausalLM, AutoTokenizer, BitsAndBytesConfig

bnb = BitsAndBytesConfig(load_in_4bit=True)

name = "Qwen/Qwen2.5-0.5B-Instruct"   # illustrative; you'd reach for this with a 7B+ model
tokenizer = AutoTokenizer.from_pretrained(name)
model = AutoModelForCausalLM.from_pretrained(
    name,
    quantization_config=bnb,
    device_map="auto",
)
Two requirements worth burning into memory: 4-bit quantization needs the bitsandbytes package, and it needs an actual CUDA GPU. There is no CPU fallback — try this on a CPU-only runtime and you’ll get an error, not a slow result. Turn the GPU on first.
(Quantizing a 0.5B model is overkill — it already fits in a few hundred MB. It’s here so you can see the exact code that works unchanged when you swap in a model 15× the size.)
When the free GPU still isn’t enough
Honesty time: the tricks have limits. A 4-bit 13B model fits on a T4. A 70B model does not — even in 4 bits it wants ~40 GB, and the T4 has 16. When you hit that wall, your options are:
- A bigger GPU — Colab Pro (L4, A100) or a cloud instance. More VRAM, the same code.
- A smaller model — there is almost always a 7B or 8B version of the thing you want, and for most tasks it’s 90% as good. Reach for it first.
- A hosted API — for the truly huge models, let someone else own the hardware and call an endpoint. Not PyTorch anymore, but often the right call.
The skill isn’t squeezing a 70B model onto a free T4 — it’s recognizing when you can’t, and reaching for the right-sized model instead of the biggest one.
Gotchas
CUDA out of memoryis the error you’ll meet most. It means the weights don’t fit. Fix it in order: addtorch_dtype=torch.bfloat16, then 4-bit quantization, then a smaller model, then a bigger GPU. Restart the runtime between attempts — a failed load can leave junk in VRAM.- The license applies to you, not Hugging Face. Downloading a non-commercial model and shipping it in a product is on you. Check the card before you build, not after legal asks.
- Gated models need login and acceptance. Logging in isn’t enough — you also have to click “Agree” on the model’s page. If you get a 401/403 after
login(), you skipped the form. - 4-bit quantization needs a GPU and
bitsandbytes. No CUDA device, no quantization — full stop. Andbitsandbytesversions occasionally lag behind new GPUs, so if it errors on exotic hardware, that’s usually why. device_map="auto"needsaccelerate. Forget to install it and you’ll get an import error pointing right at it.pip install accelerateand re-run.- Quantization is for inference, not learning. Running a quantized model to get outputs is what we’re doing here; training one is a different, fussier thing that lives in Phase II.
What’s next
You can now find a model, vet its card and license, and squeeze a surprisingly large one onto a free GPU. That’s the last piece of the foundation. In the finale we put it all together: Part 9 — Capstone: Build a Model App, where you wrap a pretrained model into a tiny shareable app — input box, output, a URL you can send to someone — and close out Phase I with something you actually built.
Target keyword(s): hugging face hub, run large models quantization, bitsandbytes 4-bit, device_map auto.
Comments