Make a Model Talk: Your First Text-to-Speech Run
Run your first text-to-speech model in Colab with SpeechT5 — text in, speech out, on CPU — and learn the encoder, mel spectrogram, and vocoder pieces behind it.
Series: Practical PyTorch: Running Models — Audio — Part 2 of 8
In Part 1 you turned sound into a tensor and stared at a spectrogram, that heatmap of which frequencies are loud, when. This post runs the machinery in reverse. You type a sentence, and a model hands you back a waveform you can actually play. The first time a Colab cell speaks to you in a voice you didn’t record, it’s a small thrill, and it’s about five lines of code.
Open the companion notebook in ColabThe easy button — a talking pipeline
Same pipeline you’ve leaned on for text and images, pointed at a new task: "text-to-speech". We’ll use SpeechT5, a Microsoft model that’s small enough to run on Colab’s CPU without a GPU attached.
First the installs. We need transformers for the model, datasets to fetch a voice (more on that in a second), soundfile to write a .wav, and sentencepiece because SpeechT5’s text processor depends on it:
!pip install -q transformers datasets soundfile sentencepieceNow the part that surprises people: SpeechT5 has no default voice. It won’t pick one for you. You have to hand it a speaker embedding — a 256-number vector that tells the model who to sound like. Think of it as a voice fingerprint. We’ll grab a pre-computed one from a public dataset:
from transformers import pipeline
import torch
from datasets import load_dataset

synth = pipeline("text-to-speech", model="microsoft/speecht5_tts")

# a speaker embedding = a 256-D 'voice fingerprint' the model conditions on
embeddings = load_dataset("Matthijs/cmu-arctic-xvectors", split="validation")
speaker = torch.tensor(embeddings[7306]["xvector"]).unsqueeze(0)

speech = synth(
    "Hello from a model that just learned to talk.",
    forward_params={"speaker_embeddings": speaker},
)
print(speech["sampling_rate"])                 # 16000
A few things to read here. embeddings[7306]["xvector"] is one specific person’s fingerprint out of thousands in that dataset; torch.tensor(...).unsqueeze(0) turns it into a tensor with a batch dimension, the same [1, ...] wrapping you met for images in the Vision series. And forward_params is how the pipeline passes that embedding through to the model — without it, you’d get an error, not a guess.
The output is a dict: speech["audio"] is the waveform (a NumPy array of samples) and speech["sampling_rate"] is 16000, meaning 16,000 samples per second. Play it right in the notebook:
from IPython.display import Audio

Audio(speech["audio"], rate=speech["sampling_rate"])
It works, and it’s a little robotic: flat, slightly mechanical. Hold that thought; it’s the whole reason Part 3 exists.
Save it to a file
A waveform you can only hear in Colab isn’t much of a tool. soundfile writes it to disk in one call:
import soundfile as sf

sf.write("speech.wav", speech["audio"], speech["sampling_rate"])
That speech.wav is a normal audio file — download it, drop it in a video, attach it to an email. The sampling rate has to travel with the samples, which is why sf.write takes it as a third argument: 16,000 numbers per second only sounds right if whatever plays it back also runs at 16 kHz.
The honest way — three parts, by hand
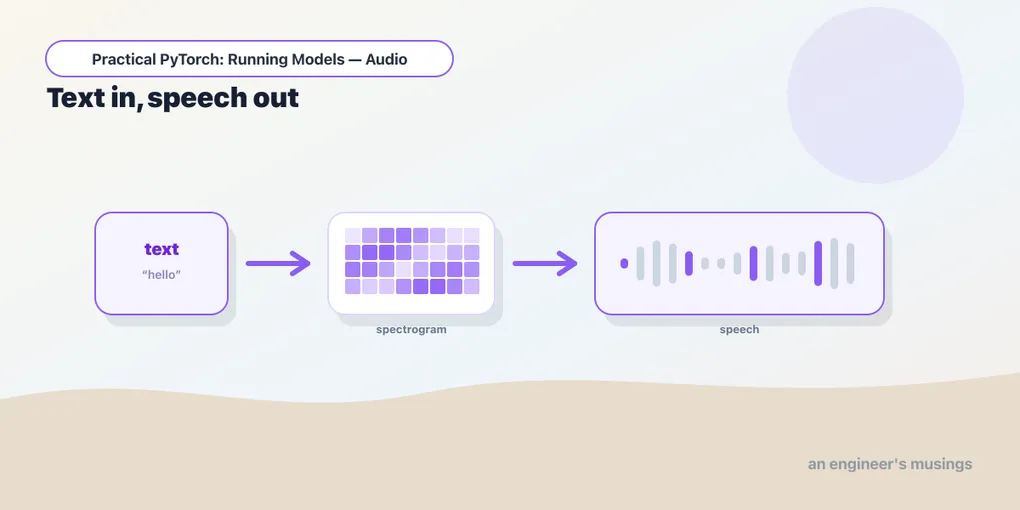
The pipeline is the right default, but it hides something genuinely worth seeing. A text-to-speech model isn’t one model — it’s a small assembly line of three, and the middle stage is the spectrogram from Part 1. Let’s build that line by hand.
from transformers import SpeechT5Processor, SpeechT5ForTextToSpeech, SpeechT5HifiGan

processor = SpeechT5Processor.from_pretrained("microsoft/speecht5_tts")
model = SpeechT5ForTextToSpeech.from_pretrained("microsoft/speecht5_tts")
vocoder = SpeechT5HifiGan.from_pretrained("microsoft/speecht5_hifigan")

inputs = processor(text="The vocoder turns a spectrogram back into sound.", return_tensors="pt")
speech = model.generate_speech(inputs["input_ids"], speaker, vocoder=vocoder)
print(speech.shape)                            # torch.Size([N]) waveform at 16 kHz
Three objects, three jobs:
- The processor is the tokenizer. It chops your sentence into the integer IDs the model reads —
inputs["input_ids"]is that list of numbers, not your words. (This is the stepsentencepiecepowers, which is why a missingsentencepiecemakesfrom_pretrainedfail outright.) model.generate_speechruns the text encoder and produces a mel spectrogram — exactly the kind of frequency-over-time heatmap you read in Part 1. The model’s actual output isn’t sound; it’s a picture of sound. Thespeakerembedding feeds in right here, conditioning that spectrogram to come out in one voice rather than another.- The vocoder, here a model called HiFi-GAN, does the last mile: spectrogram in, waveform out. A spectrogram throws away the fine phase detail you’d need to reconstruct a wave directly, so you can’t just invert it with arithmetic; the vocoder is a trained network whose entire job is to hallucinate a convincing waveform from that heatmap.
So the path is: text → IDs → spectrogram → waveform. The pipeline ran all three for you in one call; here you can see each handoff. Play the result the same way:
Audio(speech.numpy(), rate=16000)Note speech is now a PyTorch tensor, so .numpy() hands Audio the array it wants.
Changing the voice
The speaker embedding is the one knob that matters most here, and it’s just an index. Swap 7306 for a different row in the dataset and you get a different voice — same words, different speaker:
speaker = torch.tensor(embeddings[1000]["xvector"]).unsqueeze(0)

speech = model.generate_speech(inputs["input_ids"], speaker, vocoder=vocoder)
Audio(speech.numpy(), rate=16000)
Nothing else changed — same model, same sentence, same vocoder. The fingerprint did all the work. This is worth internalizing because it generalizes: a lot of generative-audio control comes from a conditioning vector you swap in, not from retraining anything. Browse the dataset’s indices and you’ve got a small cast of narrators on tap.
Gotchas
- No embedding, no speech. SpeechT5 has no built-in voice. Skip the
speaker_embeddings(pipeline) or thespeakerargument (by hand) and it errors. This trips up everyone who’s used to a model that “just works” — here the voice is a required input, not a default. sentencepieceisn’t optional. The processor needs it. Leave it out of thepip installandSpeechT5Processor.from_pretrainedfails with an import error, not a clean message about audio.- Robotic is the trade, not a bug. SpeechT5 is fast and runs happily on CPU, and you pay for that with a flat, slightly synthetic voice. That’s the deliberate trade-off — Part 3 shows you the more natural-sounding models and what they cost.
- There’s a text-length ceiling per call. Hand it a paragraph and quality degrades or it truncates; this model wants a sentence or two at a time. Reading a whole article aloud means splitting the text and stitching the clips — exactly the capstone you’ll build in Part 4.
- Sampling rate travels with the audio. SpeechT5 outputs 16 kHz. If you save or play it back at a different rate, it’ll sound sped-up or slowed-down. Always pass the rate alongside the samples.
Final thoughts
The headline isn’t “a model can talk” — it’s that the model never produces sound at all. It produces a spectrogram, the same object you plotted in Part 1, and a second network turns that picture into a wave. Once you see text-to-speech as encoder → spectrogram → vocoder, the whole field stops being magic and starts being three replaceable parts. Swap the vocoder, swap the voice vector, swap the encoder — that’s most of what “a better TTS model” means, and it’s where we’re headed next.
Next: Part 3 — Better Voices: Bark, MMS, and the Trade-offs — trading SpeechT5’s robotic speed for voices that sound human, and what each one costs.
Target keyword(s): text-to-speech pytorch, speecht5, run tts model colab.
Comments