Fine-Tuning the Lazy Way: Let the Trainer Run Your Loop
Series: Practical PyTorch · II (Phase II) — Part 5 of 9
Back in Part 2 you wrote the training loop by hand — predict, measure the loss, ask autograd for the gradients, let the optimizer take a step, repeat. It was about a dozen lines, and writing it once is genuinely worth doing, because it demystifies the whole business. But here’s the thing nobody tells you upfront: in real projects, almost nobody writes that loop. They hand it to a tool that already knows the dance.
That tool is the Hugging Face Trainer. It’s the loop from Part 2, plus all the bookkeeping you’d otherwise reinvent — batching, evaluation, logging, checkpoints, moving things to the GPU — wrapped up so you can fine-tune a real model in a handful of lines. This post takes a pretrained text classifier and fine-tunes it on actual movie reviews, end to end. Same loop underneath; you just don’t have to type it.
You could hand-write the loop… or not
Picture the Part 2 loop again. To turn it into something you’d actually trust on a real dataset, you’d have to bolt on a lot of plumbing: split your data into batches, shuffle them each epoch, move every batch onto the GPU, run a separate no-gradient pass over a validation set to see how you’re doing, print the numbers, and save the model every so often so a crash doesn’t cost you an hour. None of it is hard. All of it is tedious, and all of it is the same every single time.
So the Hugging Face team wrote it once, carefully, and called it the Trainer. You give it a model, your data, and a few settings; it runs the loop. That’s the whole trade: you give up the line-by-line control you exercised in Part 2 (which you rarely need) in exchange for not rewriting the same scaffolding on every project. Let’s fine-tune something real with it.
Step 1: load a dataset (and keep it small)
We’ll use IMDB — fifty thousand movie reviews, each labeled positive or negative. It’s the “hello world” of text classification: a real dataset, an honest task, and small enough to be friendly.
The datasets library fetches it in one line:
from datasets import load_dataset

ds = load_dataset("imdb")
print(ds)
That gives you a train split and a test split, each 25,000 reviews. Here’s the honest part: fine-tuning on all 50,000 reviews on a free Colab GPU would take you well past a coffee break. We don’t need the whole thing to see how this works — so we’ll take a small slice of each:
train_ds = ds["train"].shuffle(seed=0).select(range(2000))
eval_ds  = ds["test"].shuffle(seed=0).select(range(500))
shuffle matters here because IMDB ships sorted by label — all the negatives first, then all the positives. Grab the first 2,000 rows without shuffling and you’d get 2,000 negative reviews and a model that learns the word “negative” means “everything.” Shuffle first, then take your slice. Two thousand training examples is enough to watch the model genuinely improve, in a few minutes rather than an afternoon.
Step 2: tokenize with .map
A model doesn’t read text — it reads numbers. The tokenizer (you met these in Phase I) turns each review into the integer token IDs the model expects. We load the tokenizer that matches our model and write a tiny function that tokenizes a batch of reviews:
from transformers import AutoTokenizer

tok = AutoTokenizer.from_pretrained("distilbert-base-uncased")

def tok_fn(batch):
    return tok(batch["text"], truncation=True)

train_ds = train_ds.map(tok_fn, batched=True)
eval_ds  = eval_ds.map(tok_fn, batched=True)
The clever piece is .map. It runs your function over the entire dataset and stores the results as new columns — so after this, every row carries its original text, its label, and the token IDs. The batched=True flag hands tok_fn a chunk of reviews at once instead of one at a time, which is dramatically faster (the tokenizer is built to process many strings in one call).
truncation=True clips any review longer than the model’s maximum length. Movie reviews can ramble; the model has a ceiling on how much text it’ll accept, and truncation keeps us under it without us having to think about it.
Step 3: the model, with a fresh head
Now the model. We want a classifier, so we reach for AutoModelForSequenceClassification and tell it how many labels we have:
from transformers import AutoModelForSequenceClassification

model = AutoModelForSequenceClassification.from_pretrained(
    "distilbert-base-uncased", num_labels=2,
)
num_labels=2 is the load-bearing argument — positive and negative, two classes. This is transfer learning, exactly as Part 4 described it: DistilBERT arrives already understanding English from its pretraining, and we bolt a small, untrained classification head onto it. You’ll likely see a warning that some weights are “newly initialized” — that’s not an error, that’s the new head. Fine-tuning is the process of training that head (and gently nudging the rest) on our task.
If you were doing four-way sentiment, or topic classification across ten categories, you’d change one number. The rest of the code is identical.
Step 4: TrainingArguments — the dials
Before the Trainer can run, you tell it how to run. That’s TrainingArguments: a single object holding every knob — how long to train, how big the batches are, where to save checkpoints, when to evaluate:
from transformers import TrainingArguments

args = TrainingArguments(
    output_dir="out",
    num_train_epochs=2,
    per_device_train_batch_size=8,
    per_device_eval_batch_size=8,
    eval_strategy="epoch",
)
Read it top to bottom and it’s plain English:
output_dir— a folder for checkpoints and logs. TheTrainersaves the model here as it goes, so a crash doesn’t erase your progress.num_train_epochs— how many full passes over the data (epochs, from Part 1). Two is plenty for a demo.per_device_train_batch_size— how many reviews the model sees per step. Eight is gentle on memory; bump it up if your GPU has room.eval_strategy— when to check the model against the eval set."epoch"means “after every full pass,” so you can watch it improve.
Version note: that last argument is called
eval_strategyin recenttransformers, but wasevaluation_strategyin older versions. If you hit aTypeErrorabout an unexpected keyword, swap one for the other — your installed version expects the name it knows.
Step 5: the Trainer, then train()
Here’s the payoff. Hand the Trainer the model, the arguments, the two datasets, and the tokenizer — then call train():
from transformers import Trainer

trainer = Trainer(
    model=model,
    args=args,
    train_dataset=train_ds,
    eval_dataset=eval_ds,
    processing_class=tok,
)

trainer.train()
That’s it. That’s the fine-tune. The Trainer now grinds through your 2,000 reviews twice, evaluating after each epoch, and prints a tidy table of training loss, validation loss, and how long each epoch took. On a Colab GPU this is a few-minute affair, not an afternoon. When it finishes, model is no longer the generic DistilBERT — it’s your sentiment classifier.
Version note: current
transformers(5.x) calls this argumentprocessing_class=tok. Versions before 5.0 called ittokenizer=tok(whichprocessing_classreplaced). Ifprocessing_classis rejected, you’re on an older release — usetokenizer=instead. Same idea, renamed argument.
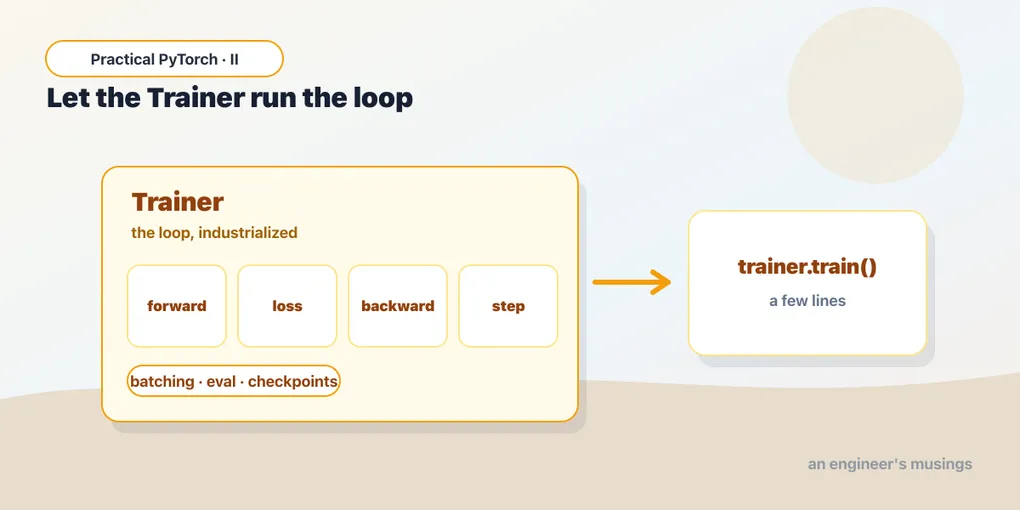
It’s the Part 2 loop, industrialized
Worth saying plainly, because it’s the entire point of this post: the Trainer did not replace the training loop. It is the training loop. Every line you wrote by hand in Part 2 is running inside trainer.train():
- It pulls a batch of reviews and runs them through the model — your forward pass.
- It compares predictions to the true labels and computes the loss — same number, “how wrong.”
- It calls on autograd for the backward pass to get the gradients — the downhill arrows.
- It lets the optimizer take a step — the nudge.
- It repeats for every batch, every epoch.
Then it layers on everything you’d otherwise have hand-rolled: shuffling and batching the data, moving tensors to the GPU, the no-gradient evaluation pass, the loss table, the checkpoints in output_dir. None of that is new machinery — it’s the same loop with the boring-but-essential parts done for you, consistently, the same way on every project. You learned the loop so this wouldn’t be a black box. Now you get to not type it.
Gotchas
- Dataset size is your runtime dial. The single biggest lever on how long this takes is how many examples you train on. Full IMDB on a free GPU is a long wait; 2,000 examples is minutes. Start small to confirm everything runs, then scale up the
select(range(...))numbers once you’re sure the pipeline works. - You need a GPU, and you have to turn it on. Fine-tuning on a CPU is painfully slow — minutes become hours. In Colab: Runtime → Change runtime type → Hardware accelerator → GPU. The
Trainerfinds and uses it automatically; you don’t write a single.to("cuda"). Checktorch.cuda.is_available()isTruebefore you start. - Tokenize with
batched=True. Without it,.mapfeeds the tokenizer one review at a time and the step crawls. With it, the tokenizer processes whole chunks at once — much faster, and it’s how.mapis meant to be used. - The label column must be named
labels. TheTrainerlooks for a column literally calledlabelsto compute the loss against. IMDB calls itlabel(singular), and theTraineris forgiving enough to handle that common case — but on other datasets, if you see an error about missing labels, rename the column withds.rename_column("your_name", "labels"). This trips up nearly everyone once. eval_strategyvsevaluation_strategy. As flagged above, the argument was renamed acrosstransformersversions. ATypeErrorabout an unexpected keyword almost always means you’ve got the name your version doesn’t recognize — swap it.- The “newly initialized weights” warning is fine. When you load the model with
num_labels=2, transformers warns that the classification head’s weights are random. That’s expected — that head is exactly what you’re about to train. It’s a notice, not a problem.
What’s next
You’ve fine-tuned a real model on real data, and the loop you wrote by hand in Part 2 is quietly humming inside trainer.train() doing all of it for you. That’s the practical path most fine-tuning takes: load a dataset, tokenize it, pick a model with the right number of labels, set a few arguments, and let the Trainer run.
But a finished training run only tells you the loss went down — and from Part 1 you know that lower loss isn’t the same as a better model. Did it actually learn to tell good reviews from bad ones, or did it just memorize 2,000 examples? That question deserves its own post.
Next: Part 6 — Evaluating Your Model, where we stop trusting the loss and start measuring whether the thing actually works.
Target keyword(s): huggingface Trainer fine-tuning, fine-tune a text classifier, fine-tuning pytorch for beginners.
Comments